When it comes to wallpaper installation, a little preparation can go a long way in saving you time, money, and frustration. Properly prepping and priming your walls ensures a smooth application, prevents issues down the line, and helps achieve a flawless finish. Here’s what you need to do before your wallpaper installer arrives.
Step 1: Patching & Sanding
Before applying wallpaper, walls must be as smooth as possible. Any imperfections will be visible through the wallpaper, especially if you’re using thin or light-colored paper. Follow these steps:
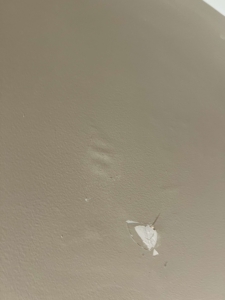
- Fill Holes & Cracks – Use a high-quality spackling compound to fill nail holes, cracks, and dents. Let it dry completely.
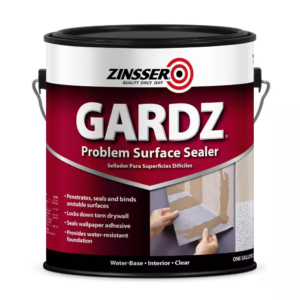
- Seal Torn Drywall – If the drywall has been torn, exposing the brown paper layer underneath, it’s crucial to seal it before applying joint compound. Use a shellac-based primer like BIN Shellac or Gardz Problem Surface Sealer to prevent bubbling and ensure proper adhesion.
- Mud & Sand – After sealing, apply joint compound to smooth the surface. Let it dry completely, then sand it down with fine-grit sandpaper (120–150 grit) until the wall surface feels smooth and even.
- Feather the Edges – When sanding, make sure to feather the edges of the patched areas into the surrounding wall to avoid noticeable patches under the wallpaper.
Step 2: Sealing & Cleaning the Walls
One of the most overlooked steps in wallpaper prep is properly sealing and cleaning the walls to prevent adhesion issues.
- Seal Repairs – If you have larger patches or fresh drywall, seal them with a skim coat of joint compound, then sand lightly before priming.
- Wipe Away Dust – After sanding, wipe down the walls with a damp microfiber cloth or sponge to remove all dust. Leftover dust can interfere with primer adhesion and cause bumps under the wallpaper. Many jobs have been ruined by painters who failed to remove dust before priming. The primer will peel and bubble, ruining the job. Unfortunately, this issue often goes unnoticed until the wallpaper is up and the moisture in the paste exposes the problem. To prevent this, always ensure a thorough wipe-down before moving forward with priming.

- Check for Grease & Stains – If your walls have any grease or stains, clean them with mild detergent and water. Avoid strong chemicals that can leave a residue.
Step 3: Choosing the Right Primer
Using the right primer is crucial for ensuring proper wallpaper adhesion and preventing issues like peeling or bubbling.
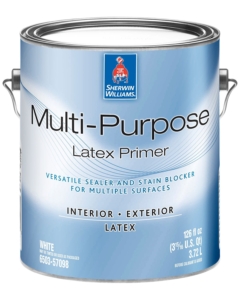
- Acrylic Primer – A hard acrylic primer, such as SW Multi-Purpose Primer, is ideal because it can be tinted to match the wallpaper. If the walls are already a close shade to the wallpaper, I prefer Shieldz Clear Primer.
- Avoid Matte Paint and Glossy Finishes as a Base – If your walls were previously painted with a matte, flat, or glossy finish, be sure to prime them. Matte paint is too porous and can absorb adhesive unevenly, while glossy finishes can prevent proper adhesion. Using a wallpaper-specific primer will help create the ideal surface for installation.

Step 4: Always Apply Two Coats of Primer
- First Coat – Apply the first coat evenly with a roller and let it dry completely.
- Second Coat – A second coat ensures full coverage and a properly sealed surface. Allow it to dry for at least 24 hours before wallpaper installation.
By following these steps, you’re setting up the perfect foundation for wallpaper installation. Proper preparation not only ensures a flawless application but also saves money by reducing the time and effort required for corrections.
If you need guidance on wallpaper removal, check out our
for best practices before starting the prep process.
Taking the time to prep and prime correctly will make all the difference in achieving a professional-quality wallpaper finish that lasts for years.
Remember, you always build a house from the bottom up—the same applies to wallpaper. Prep is everything.